DataHand Repair and Disassembly
Here are some detailed solutions to common DataHand problems.
Sunlight
If your keyboard is typing a bunch of random characters without you touching anything, make sure sunlight isn't directly shining on your keyboard. The DataHand keys work with paired light emitters and receivers — so they get confused by sunlight.
Hard Reset
Normally the first thing to try is a "hard reset". This fixes problems with keys that mysteriously stop working or produce unexpected characters when pressed. Note resetting your keyboard this will remove any customizations you might have made — If so you will then have to reprogram your keyboard.
To reset your keyboard,
[NORMAL-RESET] First, while you press and hold the "normal" key (left thumb up & west), press the special white key on the rear of your left keyboard (I use my left pinky finger).
[NORMAL-\] Then, while you press and hold the "normal" key (left thumb up & west), type the "\" backslash key (right pinky finger east).
Dust & Lint
If you have keys that don't do anything when pressed, try cleaning those keys. The problem might be as simple as dust or lint which has gotten wedged into the key, blocking the light used to sense key movement. I use a can of "Dust-Off" compressed air-in-a-can to clean my keyboard.
Cracked Solder Joints
If that doesn't work, the next possibility is that one of the solder joints connecting the switch to the circuit board has cracked and broken. The symptoms here are keys that sometimes don't work when pressed, or act as if the key was pressed multiple times.
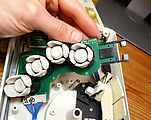
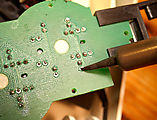
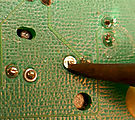
This issue not difficult to fix this for someone who is handy with a soldering iron. Taking the DataHand apart is a bit tedious, but once you're in there all you have to do is use a soldering iron to melt each of the solder contacts (one at a time) on the little circuit board that has your broken switch. Melting the joint allows the solder to reflow, fusing the crack. Each key switch has four solder contacts.
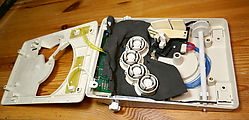
Here are some detailed disassembly instructions, followed by photos of fixing solder joints.
Disassembly
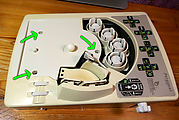
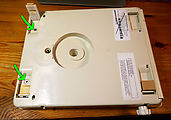
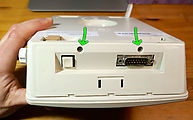
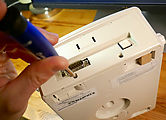
To disassemble a DataHand keyboard half, first remove the palm rest and unscrew the three top screws. Then remove the two bottom screws — one of which is hidden under a keyboard leg. Finally, remove the two screws on the rear of the keyboard. You will want to use a "micro precision" screwdriver for all these little screws.
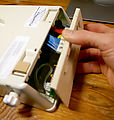
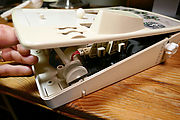
Now remove the rear cover. Behind the rear cover are two more screws that need removal. Then remove the top lid. It may require a bit of prying before it will "pop" and release.
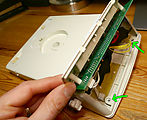
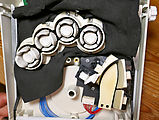
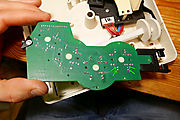
Now you see the two key circuit boards — one for the finger keys, and one for the thumb keys. The thumb board is easy to remove — simply remove the three screws holding it in place.
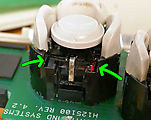
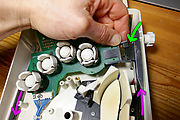
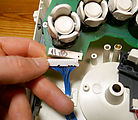
The finger board is a bit more complicated. First, remove the guard that surrounds all four finger holes, and the flexible rubber dust shield. Then the finger board must be removed from the two adjustment rails. To get started, I adjust the rails so the finger board is as tilted as possible — with the pinky keys slid downward, and the pointer finger keys slid upward away from the thumb keyboard. This loosens the black tabs that attach the board to the adjustment rail next to the pointer finger keys. With some gentle prying, I remove these two black tabs, one at a time. Once that is done, the finger board is rotated 90 degrees and the adjustment rail next to the pinky finger keys will release. You will need to remove the blue wire connector before rotating the board — use your fingernails to gently pry out this connector.
Fixing Cracked Solder Joints
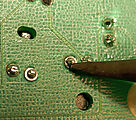
You will notice that each key has four solder connections. Rather than figure out which is cracked, just melt all four. To melt a solder joint, hold the tip of the soldering iron (once hot) firmly onto the joint until you notice the solder change. When solder is melted, it will change color (become shinier). You will probably notice the soldering iron tip move as the wire pin shifts in the molten solder, as you are pushing on it. My 40 watt soldering iron needs 10 to 20 seconds to melt a solder joint. Finally, remove the soldering iron, and the joint will quickly harden again.
Stuck Keys
Another common DataHand problem is a key that won't bounce back after being pressed. I've found this happens sometime after I accidentally spill liquid on my keyboard. Unless it's plain water, the resulting dried up residue (especially from sugary drinks) causes enough friction to prevent the key return action. The DataHand key return force is purposely very weak to minimize finger effort. The slightest additional friction will cause problems.
To fix this, I've disassembled my keyboard and gently washed the entire key-mount circuit board in water. (Yes, really!) I hold the board under the faucet, and wiggle the stuck key while water washes over it. Wait until everything is thoroughly dry before reassembly!

